|
20/10/2022 0 Comments Fall in Love with Microcurrent....
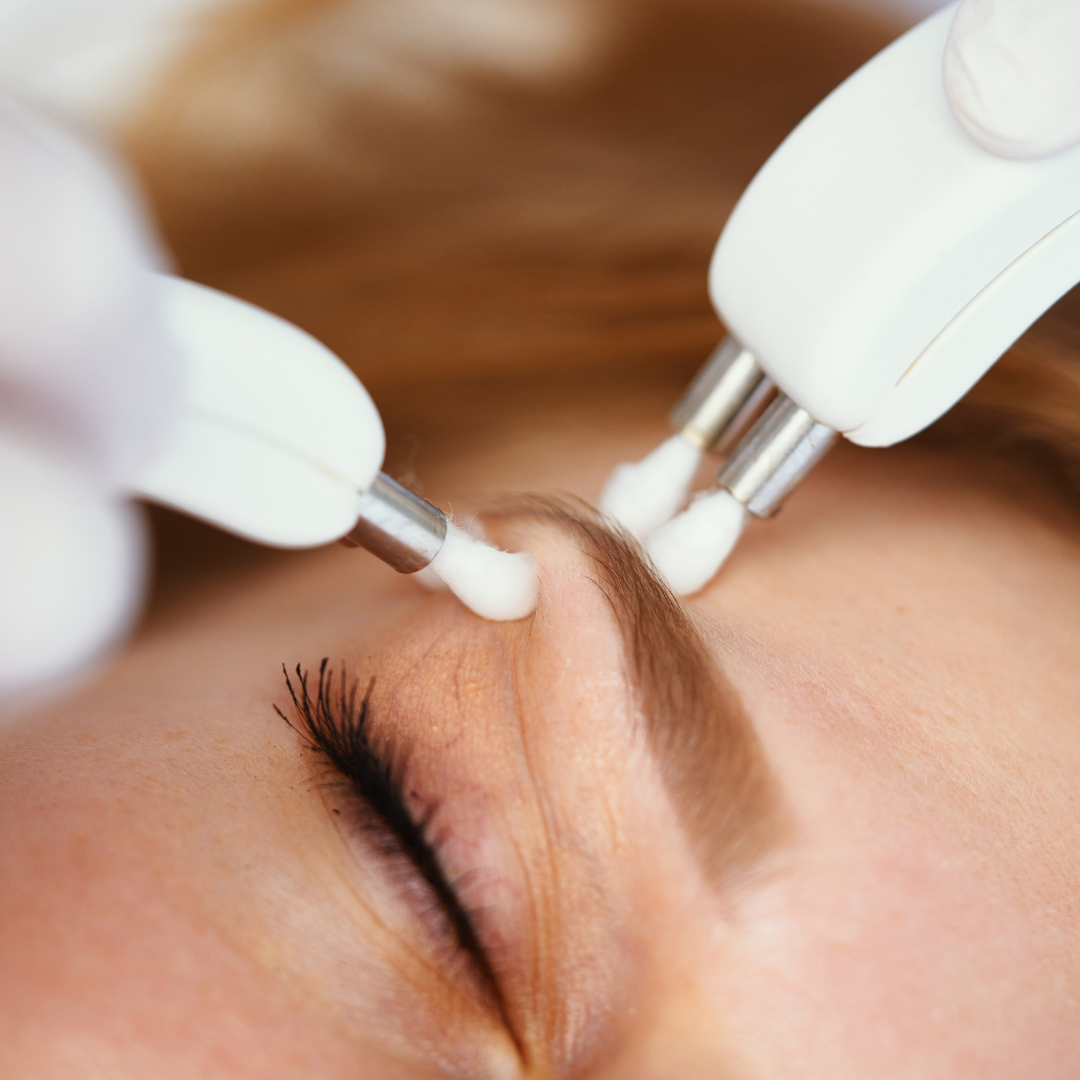
We are delighted to offer our new Microcurrent Treatment or 'Facial Gym' in the salon.
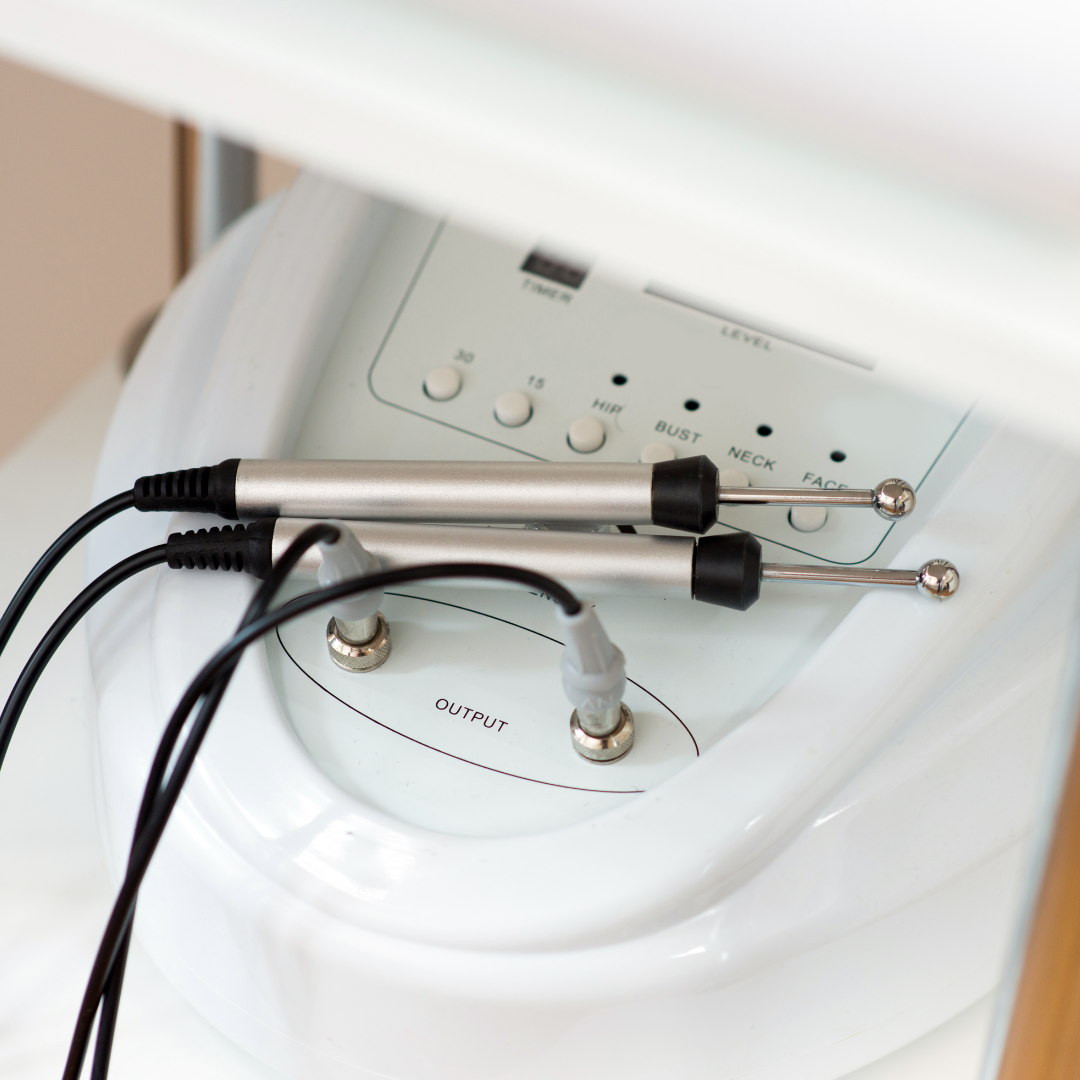
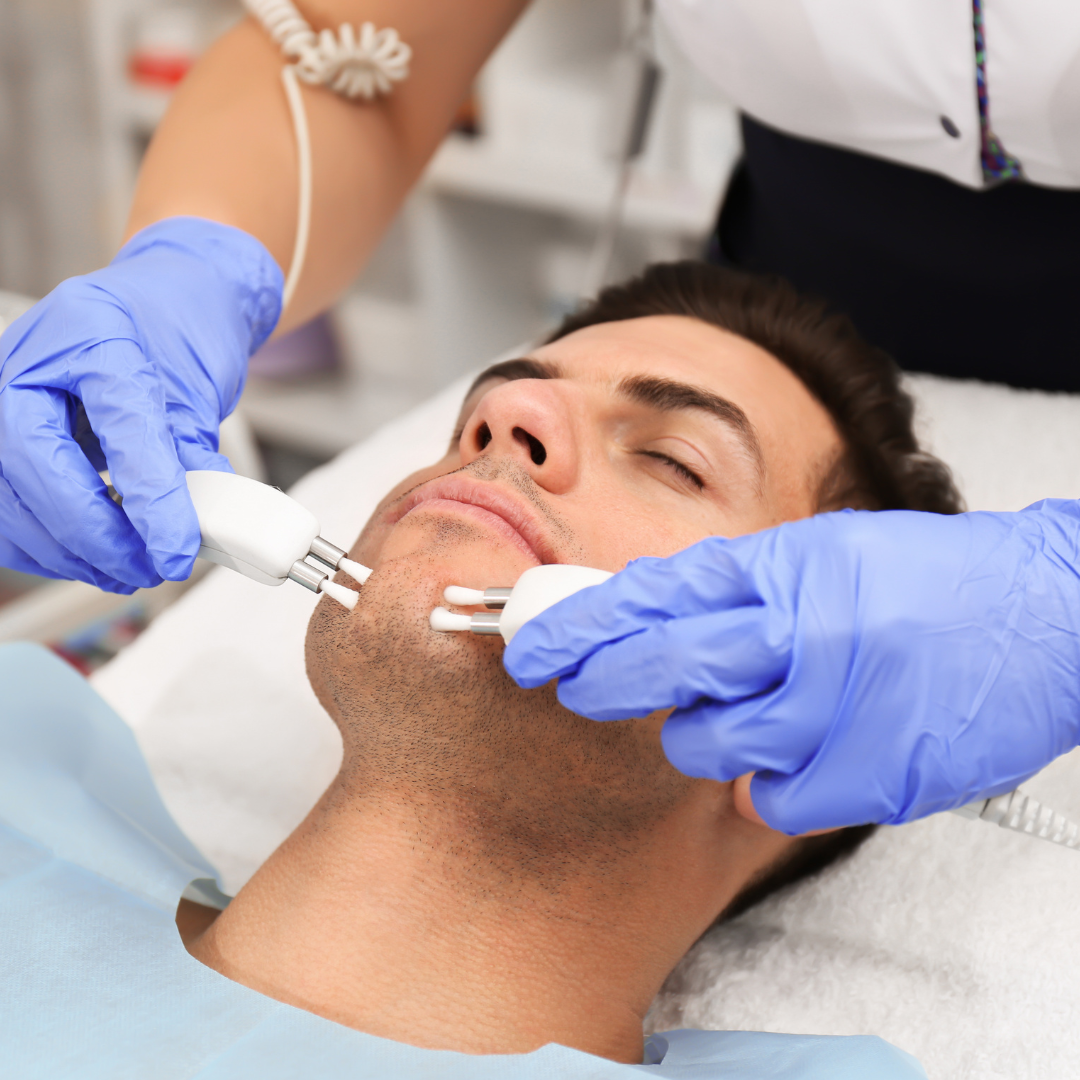
This popular face treatment will give you younger looking, healthier skin no matter what age you are or what skin type you have. What is it? A microcurrent treatment is essentially a gym work out for your face. It works by lifting and defining the muscles in the face, boosting skin laxity to give a more fresh and youthful appearance. It is painless and has zero recovery time. You can easily have it done on your lunch break and return to work afterwards. No redness, no swelling, no marks on the skin. It is a safe, non-invasive alternative to dermal fillers and surgery. But, use it or lose it, microcurrent does need regular maintenance sessions to have lasting effects. Think of when you go to the gym, you work really hard to get the physique you want, but then you have to continue to exercise regularly to keep that physique. If you don’t you will lose all of the hard work you put into it. Don’t worry though, you won’t need to do facials every day. When you reach the maintenance part of your programme, we will have you pop in every 4-6 weeks to keep up your results. So.....how does it work? Microcurrent treatments have been around for decades. They have been used medically since the 1970s to treat pain and facial paralysis, having wonderful effects on conditions such as Bell’s Palsy. In the beauty industry we use a very low voltage current to stimulate the facial muscles to lift, sculpt and tone. Using two handpieces we deliver mild electrical stimulation directly to the muscles, lifting them up and retraining them to sit back in their original position. This current also stimulates the deeper dermis layer of the skin to produce new collagen, to help combat fine lines and wrinkles. Results can often be seen after one treatment, but for best results we recommend a course of 6 – 10 treatments. You will see longer lasting results between treatments as your programme progresses, and your muscle memory begins to kick in. The treatment also boosts blood flow to the skin making it appear more radiant and healthy. Microcurrent can be a great alternative to fillers and surgery as it is a non-invasive, injection free and painless treatment. We recommend treating the entire face, but it is possible to treat individual and isolated areas, such as around the mouth or to give a brow/eye lift. What are the benefits? The overall result from a course of Microcurrent facial treatments is younger looking, healthier skin. Mirocurrent also:
It is an excellent treatment for if you hve any upcoming events, as results can be achieved quickly. Did we mention it’s painless? You may feel a little sensation during your treatment but is not unpleasant and the current used is so tiny that it is completely pain free. If you are interested in trying out the newest addition to our facial treatment menu, please contact the salon by phone on 018071007, by text/WhatsApp on 0833073399 or book online via our home page, to organise a consultation. Vanessa or Caitríona will be happy to get you started on your journey to younger, fresher, healthier looking skin. They can also advise on a suitable course of treatment for any upcoming events you may have. As with all facial treatments there are some contraindications that may prevent treatment but we will be able to assess these during consultation.
0 Comments
29/6/2022 0 Comments So.....what is acne?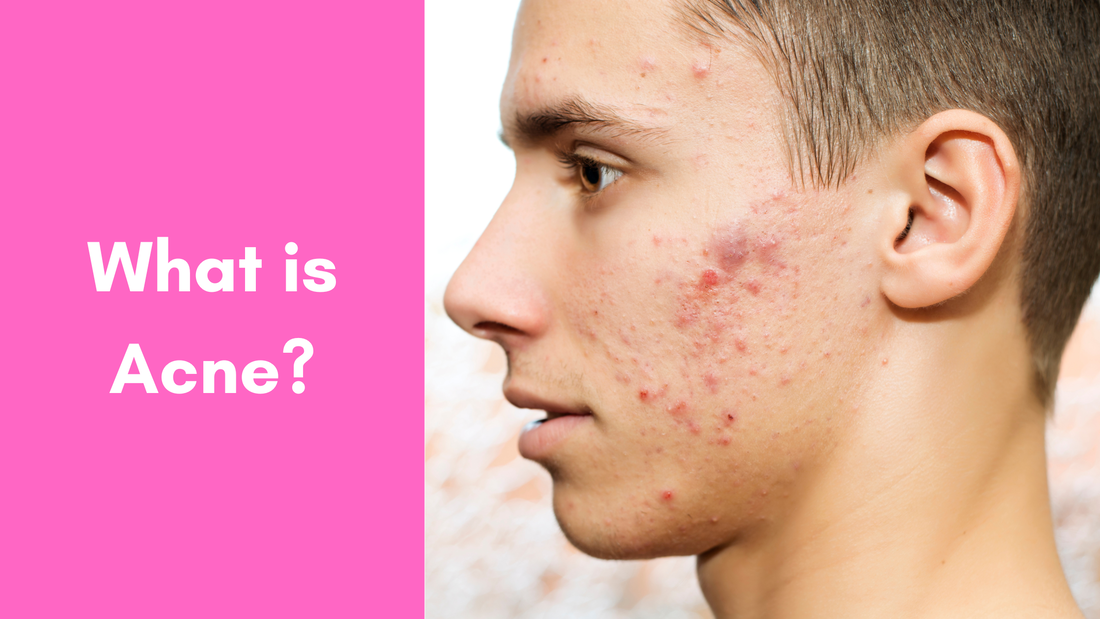 Our Skin Expert Caitriona explains 'what is acne' and why you may be suffering from it
Lifestyle Habits Lifestyle habits can have an impact on the severity of acne and sometimes all it takes is a little tweak in some of these to have a vast improvement.
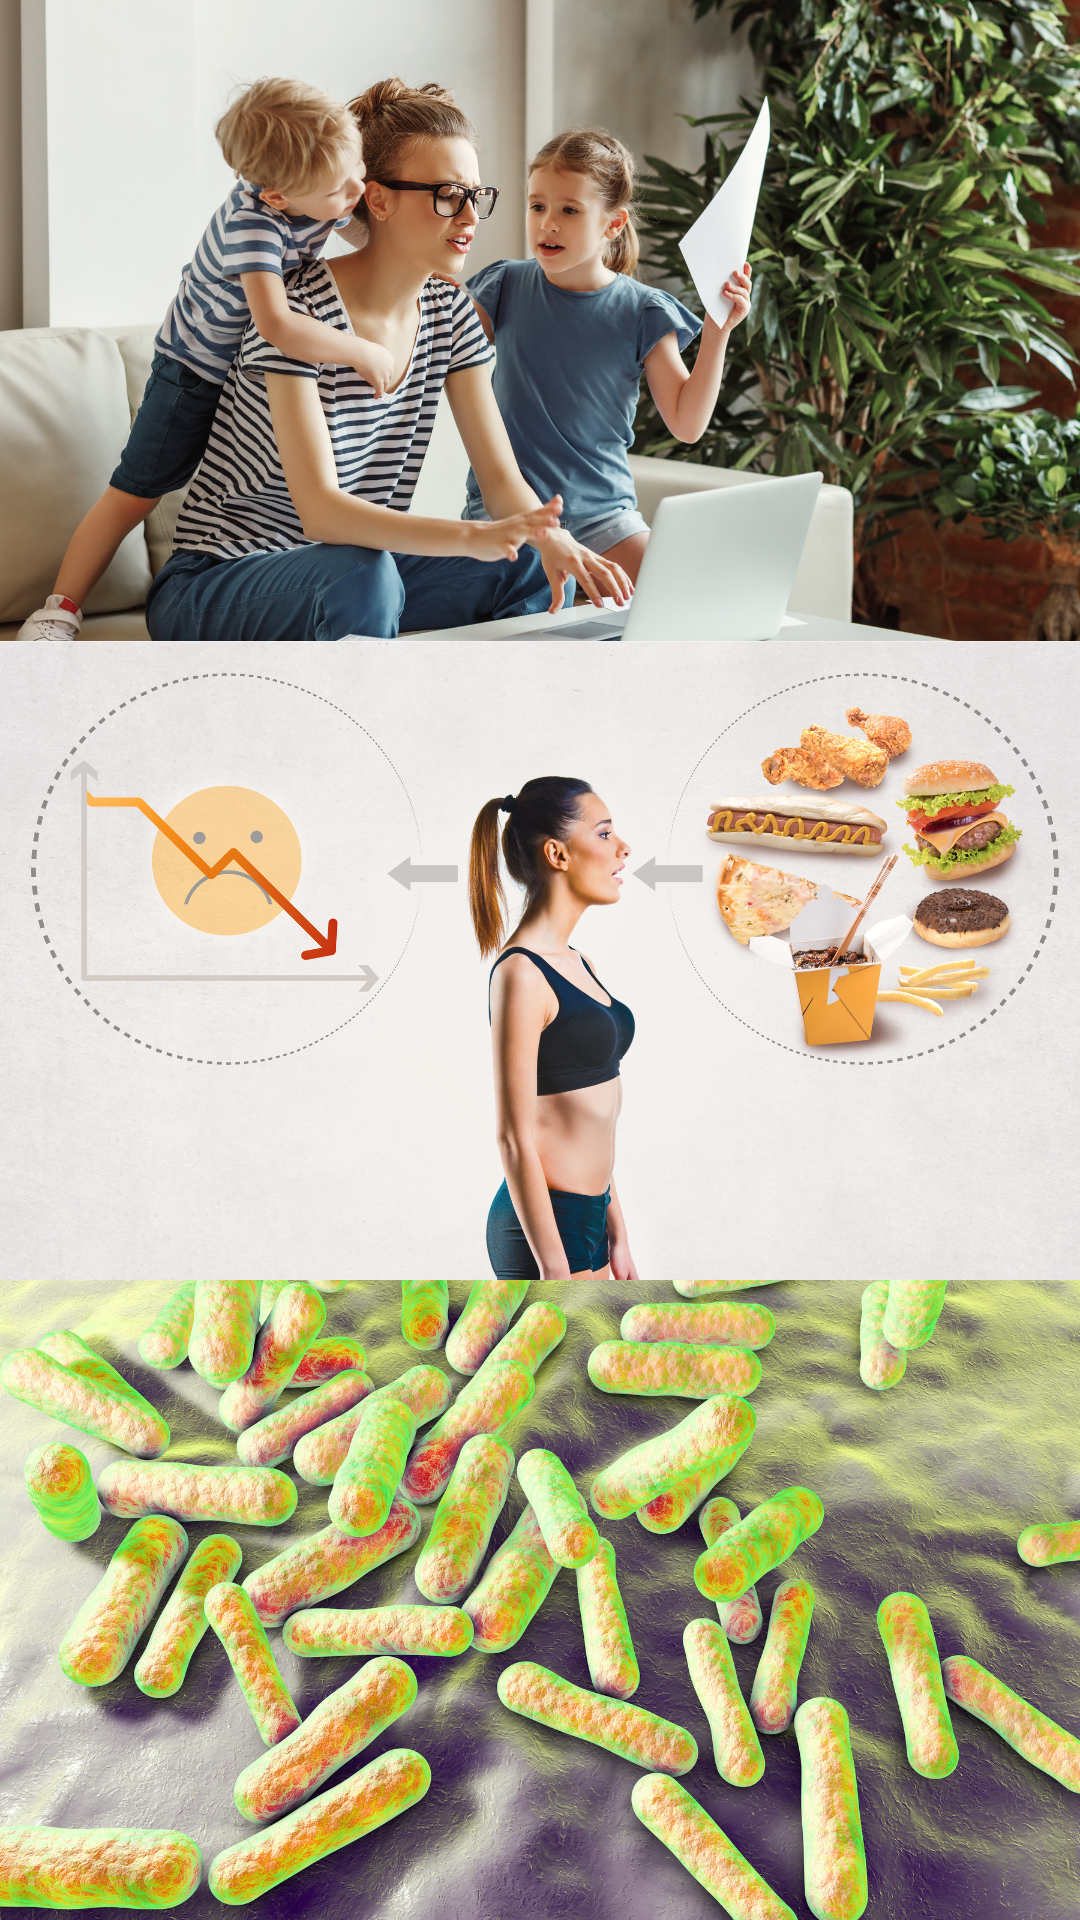
Sugar Consumption Sugary, refined and processed foods can contribute to breakouts by triggering more oil production.  How do you treat acne?
Dermalogica articles ‘Why are you breaking out?’, ‘Adult Acne’ and ‘How to treat adult acne’ used for refence during writing.  Acne Myths and Treatments (inspired by Skinbase)
As Acne Awareness Month continues, we want to debunk acne myths so that you can understand the best ways to treat your skin. Acne occurs when hair follicles become blocked with oils and dead skin cells. There are many misconceptions about the causes and triggers of acne; therefore, it is a poorly understood condition. Keep an eye out for our next blog by our skin expert Caitriona, who will give a better undrstanding of the condition as a whole. The Myths “Acne is caused by a poor diet.” Acne myth! While certain foods can exacerbate acne, current research has not found any foods that cause acne. Supposedly, greasier foods cause acne. However, there is no evidence that this is true. While unhealthier foods will not cause acne, a healthy, balanced diet and plenty of water is always recommended for your health, nutrition and to keep skin supple and glowing. “Acne is caused by poor hygiene.” Many people believe acne is a result of ‘dirty’ skin, and washing your face more frequently will get rid of it. This opinion is an acne myth. Cleansing is an important step in an acne skin care routine, and everyone should wash their face with a gentle cleanser morning and night. Over-cleansing could actually aggravate and worsen your skin and have little effect on getting rid of acne, by causing an imbalance in the natural microbiome of the skin. Most of the biological reactions that trigger acne occur in the deeper levels of the skin, so cleanliness is not the cause. “Squeezing spots is the best way to get rid of acne.” It can be very tempting to pop or squeeze a pimple on your face to get rid of it. However, the best course of action is to leave your skin alone! Picking at your acne can push bacteria and pus deeper into the skin, which can cause permanent damage. A popped pimple can lead to more swelling and redness as it delays the body’s natural healing process. Picking can also lead to scabs, scars, and spots as the bacteria spread, so this one is definitely a myth. “The sun helps improve the appearance of acne.” False! Though acne may appear improved after some sun exposure, it could be doing more harm than good as unprotected or prolonged exposure to the sun damages the skin. The sun's UV rays minimise acne-causing bacteria, and suppress immune cells in your skin which may temporarily reduce redness and clear up skin. However, many acne treatments make your skin more sensitive to sunlight, causing painful burning, an increase in hyperpigmentation, and skin damage. Prolonged exposure also increases your risk of skin cancer and can maximise the appearance of acne scars. Treat your acne with professional treatmetns and a good, consistent home care routine, not sun damage and don’t forget the SPF! The Treatments Here in the salon we have a range of treatments and products that are proven to give excellent results in the treatment of acne. Our treatments include:
Our products include:
If you would like to discuss your acne skin condition with one of our skin experts please get in touch. We can help you to come up with a treatment plan and advise you on a good home care routine to help improve the appearance and feel of your skin. You can reach us by email on info@carolinesbeautyroom.com or drop us a text/whatsapp on 0833073399 and we will contact you for a chat. We can also organise an in-house or online consultaion for you.  Caroline & Caitriona walked a marathon each, 42.2km, during April to take The Next Step to fight homelessness and support Focus Ireland. 8,200 people are experiencing homelessness in Ireland today, including over 2,300 children.
We kept everyone up-to-date on our progress on our social media channels. We raised a total of €665. You can find us on Instagram and Facebook as @CarolinesBR  You will need:
• A strong, rough grit nail file • A smoother grit nail file • A soft nail buffer • A cuticle pusher or orangewood stick • Cuticle oil / cuticle conditioner / hand cream You cannot soak off the hard gels we use, they can only be filed off. Gel is a softer product than acrylic so files off easier but you must exercise extreme caution as you get closer to the nail plate. You can cause damage easily so please be careful. If you feel any heat or pain make sure to stop and look at what you are doing. Step 1: Using the strong, rough grit nail file, reduce the length of your nails and file across the top of your gel nails. Do not saw back and forth as this creates heat. Take long strokes using as much of the length of your file as you can, lift off the nail at the end of each stroke. As the gel thins and you get closer to your natural nail, change to the smoother side of your file. DO NOT CUT THE LENGTH with a clippers or any other cutting tool - this can be tempting but you can shatter the gel and the cracks can go in any direction, they can travel up the nail and possibly split your own natural nail. Step 2: As you get closer to the natural nail you will find it harder to differentiate between the product and your own nail. Be prepared to leave a little product on the nail plate. You can also swipe the nail with a little acetone or non-oily polish remover on cotton wool. Your natural nail will show a chalky finish, the product will look smoother, only file on the product. (make sure to protect your work surface before using acetone or polish remover) Step 3: Once you have removed your product, carry out a mini manicure. • Trim and file the free edge of the nails, use a fine grit file. • Soak the nails in warm water or apply cuticle eraser to soften the cuticles so you can push them back with your cuticle pusher. • Buff the nails lightly to remove and dry or dead cells, take care not to buff too much as you can thin out the nail plate. • Apply cuticle oil/cuticle conditioner/hand cream and massage into the cuticle area of the nails. We have files, buffers and cuticle oils available to purchase from the salon. Please contact us if you need anything.  What you will need:
• A rough grit nail file • A fine grit nail file • A soft nail buffer • Acetone • Pre-cut squares of tin foil • Nail Wipes / Cotton Wool Discs • Orangewood Stick • Cuticle Oil/ Cuticle Conditioner/ Hand Cream This will take time and elbow grease so be prepared!! Step 1: Using the strong rough grit nail file, file across the top of your acrylic nails. Acrylic is a hard product and is not as easy to file as gel. You need to fully remove the top coat/gel polish and create deep scratches in the nails that will allow the acetone to penetrate more easily. Work one hand at a time. DO NOT CUT THE LENGTH with a clippers or any other cutting tool - this can be tempting but you can shatter the acrylic and the cracks can go in any direction, they can travel up the nail and possibly split your own natural nail. Step 2: Cut the nail wipes into halves and soak a piece with acetone. Please take care when using acetone at home. It is a solvent and if spilled can affect painted or varnished surfaces. It is advisable to place a protective layer on your surface. Step 3: Place the piece onto the nail and wrap the nail in tin foil, repeat on all 10 nails. Soak for at least 20 minutes. Step 4: Remove the tin foil from one nail at a time and using a cuticle pusher or orangewood stick scrape any product from the nail plate. With acrylic, you may not get all the product in the first go. You may need to re-soak the cotton wool and wrap again. Repeat for each nail. This is the time consuming part and you may not get all of the product off. Please be careful if filing over the top off the nail to get product off, make sure to use a softer file and if you feel heat or pain, stop. Step 5: Once you have removed your product, carry out a mini manicure. • Trim and file the free edge of the nails, use a fine grit file. • Soak the nails in warm water or apply cuticle eraser to soften the cuticles so you can push them back with your orangewood stick. • Buff the nails lightly to remove any dry or dead cells, take care not to buff too much as you can thin out the nail plate. • Apply cuticle oil/cuticle conditioner/hand cream and massage into the cuticle area of the nails. We have a Gel Polish / Acrylic nail removal kit available to purchase on our online store. 5/11/2020 0 Comments How to Remove Gel Polish at Home You will need:
• A rough grit nail file • A fine grit nail file • A soft nail buffer • Acetone • Pre-cut squares of tin foil • Nail Wipes / Cotton Wool Discs • Orangewood Stick • Cuticle Oil/ Cuticle Conditioner/ Hand Cream Step 1: Using the rough side of your nail file, file firmly across the top of your UV polish. This creates scratches in the top seal that will allow the acetone to penetrate easily. You need to get through the top gel layer to the colour underneath. Take extreme care not to file your natural nail, to prevent damage to your nail plate. If you feel heat or discomfort – stop. Step 2: Cut the nail wipe/cotton wool into quarters and soak with acetone. Please take care when using acetone at home. It is a solvent and if spilled can affect painted or varnished surfaces. It is advisable to place a protective layer on your surface. Step 3: Place the piece of nail wipe/cotton wool onto the nail and wrap the nail in tin foil, repeat on all 10 nails. Soak for approx 10 minutes. This should be done one hand at a time. Step 4: Remove the tin foil from one nail, the product should look lifted and crumbly. Using the orangewood stick, scrape any product from the nail plate. Repeat for each nail. If the product is tough to remove just wrap it back up with some fresh acetone and wait another couple of minutes. Step 5: One all product is removed, carry out a mini manicure. • Trim and file the free edge of the nails, use the smoother side of your file. • Soak the nails in warm water to soften the cuticles so you can push them back with your orangewood stick. You can even use your thumb nail in a pinch. • Buff the nails very lightly to remove any dry or dead cells, take care not to buff too much as you can thin out the nail plate. • Apply cuticle oil/cuticle conditioner/hand cream and massage into the cuticle area of the nails. We have a Gel Polish / Acrylic nail removal kit available to purchase on our online store. Collagen Lift from Skinbase is our most advanced and effective anti-ageing treatment yet. We introduced it to the salon back in March, just two weeks before lockdown. As excited as we were, we unfortunately had little time to tell you much about it. So, let’s get started.
As skin ages the fibres within the dermal layers start to lose their structure. The collagen in our skin that we are born with decreases by approximately 1% every year from the age of 25 and our elastin fibres become stretched and loose over time. They become sparser and more irregular causing fine lines and wrinkles to form and the skin to lose its plump, youthful appearance. Collagen Lift firms, tightens and plumps the skin without recovery or downtime. It is a non-surgical, non-invasive treatment that uses radio frequency energy waves to realign fibres within the skin back into a more even and structured pattern. This improves the skin tone and appearance and helps to reverse the signs of skin ageing. Elastin fibres tighten and we begin to produce new collagen, similar to the kind we see in scar tissue when the skin has to regenerate and repair itself. Some results can potentially be seen immediately after the first treatment, with a tightening and smoothing effect. Continuous improvements from a course of treatments can be seen for up to 3 months, with long term results lasting up to 2 years, as new collagen is produced over the coming weeks. The very best part of this treatment? It is painless, enjoyable and relaxing. Clients describe it as feeling similar to a hot stone massage. That old saying that ‘there’s no beauty without pain’ couldn’t be further from the truth. Just lie back and let us gently, warmly and effectively treat your skin. Also, this treatment is not just for the face, it can be used on thighs, bum and tum to tighten and lift! What are the benefits?
What areas can be treated?
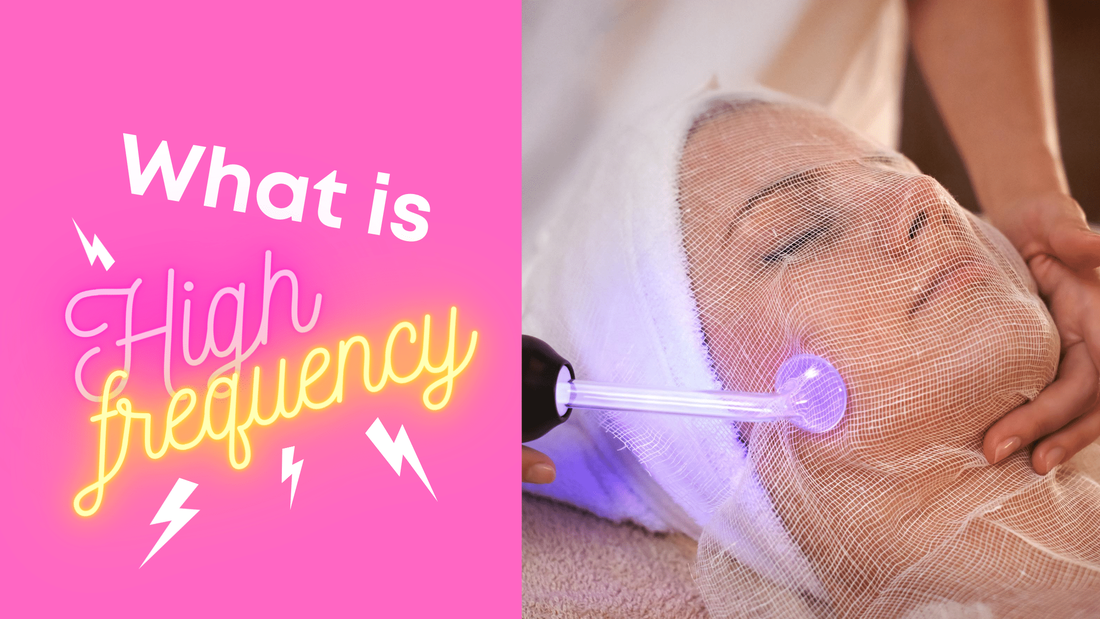
Sounds great, what do I do now? The first step is a consultation and a patch test at least 48 hours before treatment. This takes roughly 15 minutes and determines whether the treatment is suitable for you. There are certain underlying conditions that prevent us from offering the treatment to everyone. We patch test you check that you can tolerate the conductive gel and energy waves working together. We will also discuss pricing and treatment plans so you can make a fully informed decision about whether it is right for you in every sense. On the day of your treatment, you will have to remove jewellery and any other metal you may have in contact with your skin, before getting comfortable on the bed. Your face is cleansed and a hydrating, conductive gel is applied. Then, as you will see in the video, 2 different ceramic wands are used in a circular, lifting motion to deliver the energy waves into the skin to stimulates the production of collagen and tighten elastin fibres. The radio frequency energy waves prompt the cells within the skin to metabolise more effectively, stimulating your microcirculation. This increases oxygen flow to the tissue which helps promote skin healing and rejuvenation. The treatment also speeds up the elimination of toxins from the body by stimulating the lymphatic system. This aids the immune system in removing waste and debris from the body, resulting in a detoxifying effect. To complete the session we then apply a hydrating serum, a nourishing moisturiser and a good broad spectrum SPF. For best results Skinbase recommend a course of treatments is recommended. Speak to one of our skin experts in the salon to discuss your needs and come up with a treatment plan. Check out our accompanying video to see Caroline have a treatment done. 13/8/2020 0 Comments What is High Frequency?
High Frequency may sound a bit daunting when you think of it. I’ll admit using an electrical current on the skin sounds more like a torture device than a facial treatment and when I first learned of this treatment back in college I was hesitant to say the least. What I discovered though, is a very comfortable and highly effective skin treatment, especially for acne.
High frequency has been studied by scientists, including Nikola Tesla, since the late 1800’s. It was used in medicine to treat infection before the discovery of antibiotics and has been widely used in beauty treatments since the 1920’s. The machine uses various shaped glass electrodes to direct a controlled current onto the area being treated. The therapist is in complete control of the level of current being used and will start the treatment on the lowest possible setting. This is gradually increased to a level that is effective and that the client is comfortable with. There are two ways to use the machine to get different results from it. When treating acne the machine is used to create a layer of ozone between the skin and electrode. The germicidal effect of ozone kills the bacteria that causes acne which reduces inflammation and helps to ease pain. Also, the current stimulates skin rejuvenation to boost healing. It is possible to see a visible improvement within 24-48 hours of the first treatment but for best results we recommend a course of treatment combined with a targeted Dermalogica home care routine. The machine can also be used to treat fine lines and dry skin. In this case it is used to increase circulation and metabolism, stimulate skin rejuvenation and improve moisture balance. This is a very relaxing treatment combining massage and high frequency. Why not call the salon to discuss your own skin concerns and we can go through a treatment plan with you?
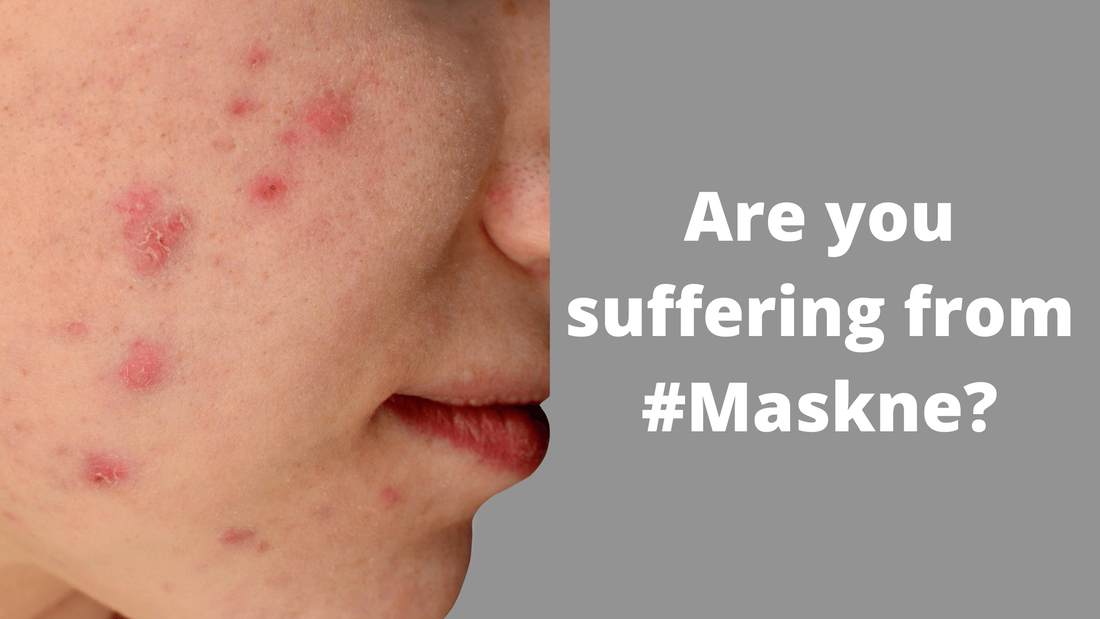
With people wearing face coverings to help keep the coronavirus infection rate down, “maskne”(aka mask acne) is becoming a more common skin issue. With clients suffering with chafed and irritated skin on their mouth, chin and jaw line as a result of wearing a face covering, skincare professionals will undoubtedly be sought out for advice on how to manage the symptoms of this frustrating, uncomfortable and, at times, painful condition.
Understanding how the condition develops is the starting point to addressing the symptoms, acknowledging with a dose of pragmatism that complete elimination may not happen for everyone until there is no longer a requirement for the offending protection. That being said, there’s a lot that can be done to reduce the severity of the symptoms in most cases, so let’s explore the facts. Why does maskne happen? Breakouts, increased oiliness and blackheads are the result of a condition known as acne mechanica, and this type of acne is caused by friction, increased heat and/or pressure. It is really common among athletes and dancers where sports clothing or protective wear can rub, and it is also exacerbated by sweating. Since face coverings rub and irritate the skin too, they can also result in this condition. So, if your clients are already prone to breakouts then wearing a face covering will amplify the condition. A mask also traps the breath which causes an increase in humidity and temperature in this region. As the skin temperature increases so does circulation and sweating, and this combination of friction and heat means accelerated oil and cell production. Together with increased sweating, this can result in clogging and congestion on the skin. The warm, moist environment is the ideal breeding ground for cutibacterium acnes (formerly propionibacterium acnes) – bacteria commonly associated with inflamed and infected breakout lesions in acne conditions. Initially the skin may feel rough, but it gradually becomes bumpy, and then starts to develop more blackheads, raised papules and painful lesions. How can I effectively treat maskne? There are several strategies to reducing these breakouts. Firstly, advise your clients to wear a clean mask or face covering each day. Reusable fabric face coverings should be washed and left to dry thoroughly. Trying to reduce bacterial build-up is beneficial for the skin but also ensures essential hygiene necessary for controlling coronavirus risks, too. Taking the mask off for a period, if it is appropriate to do so, will also give the client’s skin some respite. Advise your clients to avoid wearing make-up underneath a mask if at all possible and get them to introduce products into their regime that can help keep the skin clear. A face wash with salicylic acid is an excellent choice as it reduces clogging and has an anti-inflammatory action, such as Dermalogica’s Clearing Skin Wash, or try a balancing probiotic cleanser like Active Clay Cleanser. Gentle and regular exfoliation with either a mild AHA or BHA is an important addition to the regimen provided the skin is not experiencing dermatitis or chaffing. Keeping skin hydrated with a light or mattifying moisturiser which will improve the skin’s barrier, help regulate sebum production and reduce irritation. Dermalogica’s Active Moist is a great option. When choosing a spot treatment opt for a less drying formula like Dermalogica’s Age Bright Spot Fader, which can add to skin irritation when friction and rubbing are a concern. Breakouts are not the only concern though. Irritant contact dermatitis or eczema can develop in these pressure areas where masks or face coverings abrade the skin. Apart from red and sensitive patches, skin can even become raw and weeping. To ease discomfort and pain, restore the client’s lipid barrier with soothing barrier products such as Barrier Repair, and keep their product regimens simple. Cleanse with a gentle cream or gel-cream cleanser and keep skin well moisturised. Get clients to avoid artificially fragranced products, or those with astringent botanicals, as not only will they sting on application, but they can increase redness and aggravate the sensitivity. Look out for beta-glucan from oats or oat kernel oil, which is excellent at reducing inflammation, soothing irritation and restoring the natural skin barrier. Vitamin B5, also known as panthenol, is particularly good at promoting healing of this tender skin. Support the skin with hyaluronic acid and plant oils rich in vitamin E, antioxidants and essential lipids such as avocado, sunflower and chia seed oil. Moisturisers, light facial oils and nourishing masques could all prove beneficial as the inflammation reduces. Focus on practical advice that is easy for your client to implement because it may be some time before we can be out and about without the need for face coverings. |
Our Salon TeamOur team have a wealth of experience in the beauty industry, with varied & interesting experiences in their careers that they are excited to share with you. They will provide lots of varied informational posts including skincare, nails, behind the scenes, product information, how to's, and much more. CategoriesAll Beauty Tutorials Nails Salon News Skincare Skin Treatments Sun Safe Archives
October 2022
|
 RSS Feed
Caroline's Beauty Room33 Kenure Park, Rush, Co. Dublin, R864
Phone 083 3073399 Text 083 3073399 email carolinesbr-queries@yahoo.com We aim to respond to all email queries within 48 hours, excluding national holidays. Opening Hours
Sun/Mon: Closed Tues: 10am-5pm Wed: 10am-8pm Thurs: 10am-8pm Fri: 10am-6pm Sat: 10am-3pm |
|
Find Us
|